
These days, there’s no shortage of ways to watch your favorite TV shows and movies. Between smart TVs, streaming devices, and the good old-fashioned internet browser, you can find practically anything to watch in any way you’d like to watch it. Easy-connect streaming devices make enjoying your monthly entertainment subscriptions as simple as connecting to your TV, pairing to your Wi-Fi, and kicking back to relax.
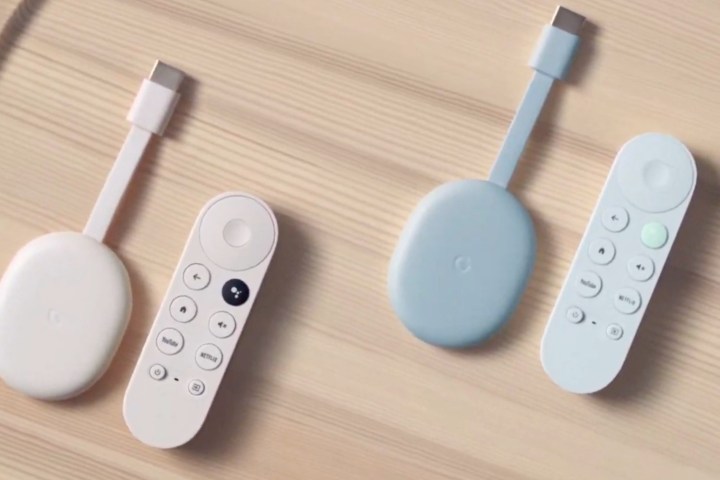
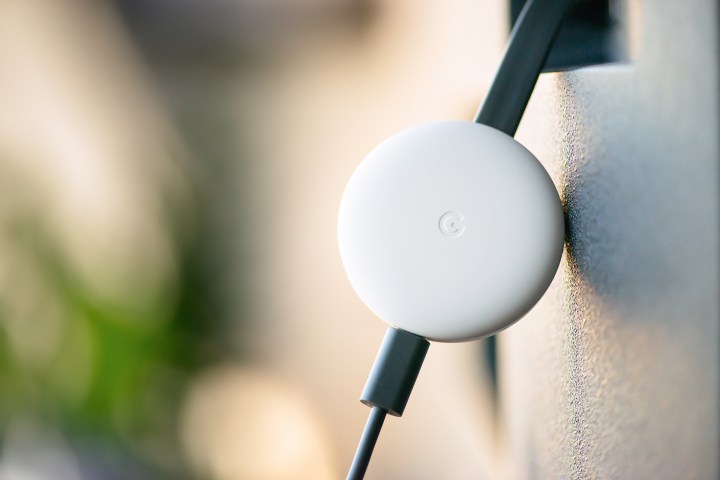
One of the most popular streaming devices is the Google Chromecast. Different from other streaming devices, Google’s streaming hardware is a plug-and-play HDMI device that allows you to “cast” audio and video from your preferred device to your TV. The 2020 Chromecast with Google TV adds an onscreen menu and physical remote control to make the experience even more convenient.
However, Chromecast is a little different from other streaming devices you may have encountered. If you’ve just bought a new Chromecast and aren’t sure how to get it up and running, we’re here to help. Here’s an easy step-by-step guide for you. When you're ready, we also have an in-depth post of great Chromecast tips and tricks.
Setting up a Chromecast with Google TV
Google’s latest Chromecast model, Chromecast with Google TV, is its first to feature a fully-navigable TV screen interface that you can peruse using both the included remote or the Google Home app. While the setup is similar to that of the standard Chromecast, there are a few additional steps needed to get things fully up and running.
Step 1: Connect the HDMI portion of your Chromecast with Google TV into one of your TV’s free HDMI ports. Then, connect one end of the Micro USB power cable to the Google TV and the other end into an available wall outlet.
Step 2: Switch your TV to the correct input and give the remote a few moments to pair. If the screen reads “start pairing” this means that you should manually pair the remote to the Google TV. To do so, press and hold the back and home buttons on the remote until its LED indicator starts pulsing.
Step 3: If you choose to continue setup using the Google Home app, refer to the standard Chromecast step-by-step setup below. If you’d rather continue setup with the remote, select Set up on TV instead and follow the onscreen instructions.
Step 4: If you’d like to control your TV, receiver, or soundbar with your Google TV remote, select Set up remote to begin a series of prompts that will direct you on linking various remote commands (power, volume, mute) with your A/V equipment. If you’d rather skip this step, select Not now instead. If you want to link your remote to A/V gear another day, you can do so by going into Settings.
Step 5: After your Google TV installs your preferred entertainment apps, you’re ready to begin using your new Chromecast. Select Start exploring to access the Home Screen.
Setting up a standard Chromecast (3rd Gen)
Step 1: Unbox your Chromecast and make sure the Chromecast, the Micro USB to USB power cable, and wall adapter are inside.
Step 2: Connect the Micro USB cable to your Chromecast, and then plug the broad end of your Chromecast into an open HDMI port on your TV.
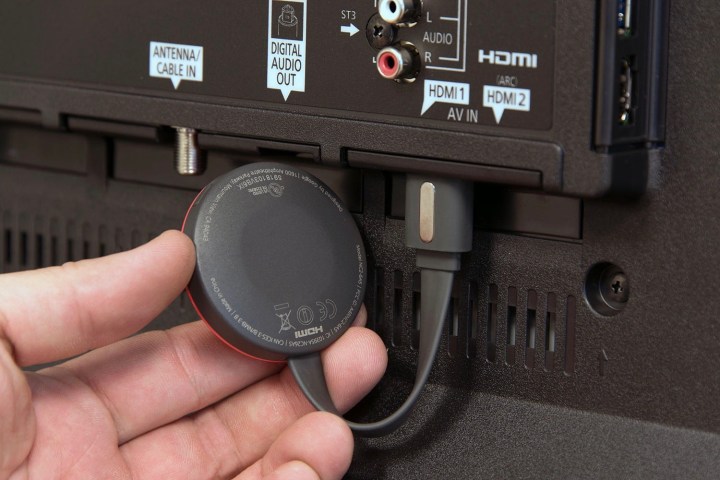
Step 3: You’ll need to plug in the USB cable in order to power the Chromecast. If your TV has a USB power port, plug it in there. If the port works, you should see a little LED on your Chromecast light up. If it doesn’t light up, remove the USB from the port, plug it into the USB wall charger, and plug the charger into the nearest wall outlet. If needed, you can purchase an HDMI extender cable to extend the reach of your Chromecast to your nearest outlet.
Step 4: Turn on your TV, and switch to the corresponding HDMI source. You’ll know you’re on the right input once you see the Set me up screen.
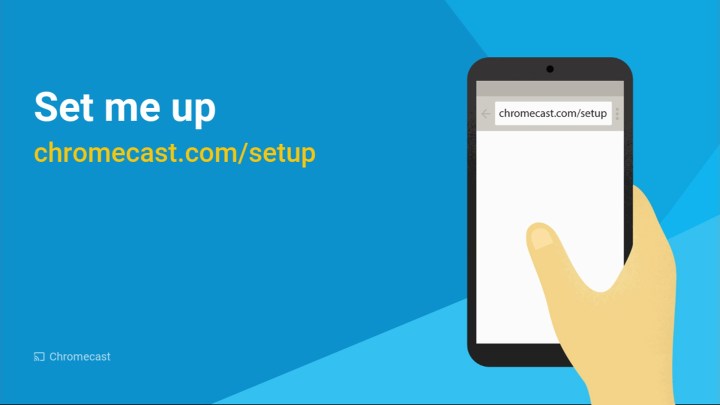
Step 5: You can set up your Chromecast with your laptop by visiting chromecast.com/setup, or you can set it up with your tablet or smartphone by downloading the Google Home application.
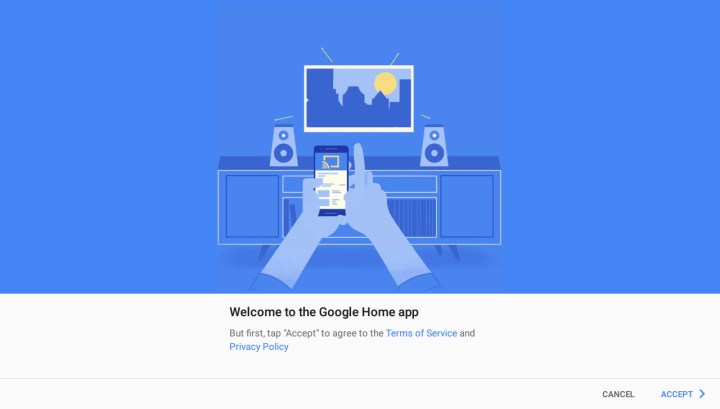
Step 6: Once you’ve downloaded the app and accepted the terms of service in the Google Home app, tap Devices on the top right corner of the screen.
Step 7: After you’ve allowed the app to access your location, Google Home will find the Chromecast nearest to you. After you choose your Chromecast, tap Set Up and then Continue.

Step 8: After the app establishes a connection to the Chromecast, tap Continue.
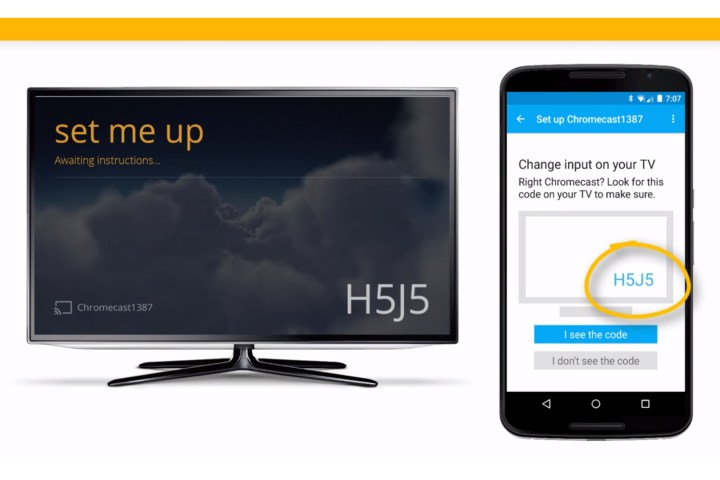
Step 9: A code should then pop up on your phone and your TV. If they match, tap I See the Code.
Step 10: Choose a name for your Chromecast (hopefully something fun and clever), and then tap Continue.

Step 11: Once you’ve named it, set up your Chromecast to connect to your Wi-Fi by entering your password in the provided space.

If your Chromecast (standard or Google TV) couldn’t connect to Wi-Fi, you might want to ensure your computer or mobile devices are compatible with your Chromecast. If you’re still running into trouble, visit the Chromecast Help Forum. Some phones, computers, and routers might need special instructions, depending on how old or new your software is. To personalize your Chromecast, you might want to consider signing into your Google account on the device, but make sure you turn off email notifications unless you’re looking to get frequent news and updates on how to best use your device. You’ll also be treated to a “How to Cast” video, which you can watch below.
Also, be sure to check out our Chromecast tips and tricks article to get the most from your new streaming companion.
Editors' Recommendations
- How to watch March Madness online
- The most common Netflix problems and how to fix them
- This simple trick gets you 54% off an Amazon Fire TV Stick 4K
- MLS Season Pass will be available to sports bars and the like
- T-Mobile subscribers can get MLS Season Pass for free


