
How to get the Finishing Touches achievement in Hogwarts Legacy

For those who want to go above and beyond as a student in Hogwarts Legacy, collecting all the achievements or trophies in the game will be your badge of honor. There are quite a few to earn, many involving collectibles and completing challenges, however there is one that may prove a bit more complicated than the rest. The Finishing Touches achievement is tricky due to it asking you to use specific attacks on every single enemy in the game. If that sounds overwhelming, fear not, as we will walk you through every step of how to get the Finishing Touches achievement in Hogwarts Legacy.

How to complete the Finishing Touches achievement

A student waving a wand in Hogwarts Legacy.

The requirements for this achievement are to use Ancient Magic on every single enemy type in the game. Note that you simply need to hit them with it, not necessarily defeat them with it, which is merciful. Ancient Magic is used by filling up a meter by performing normal attacks and then pressing both shoulder buttons on your controller to unleash a powerful attack. You unlock this ability once you reach Hogsmeade early on in the main story.

There are a total of 38 enemies you need to use Ancient Magic on to get this achievement. Not every single enemy in the game counts toward this total, specifically enemies that only appear during story missions that can be missed. To help you keep track and locate the enemies you need to unleash your magic on, here’s a full list and where you can find them in the open world.

  1. Acromantula
    • Location: North Ford Bog Battle Arena
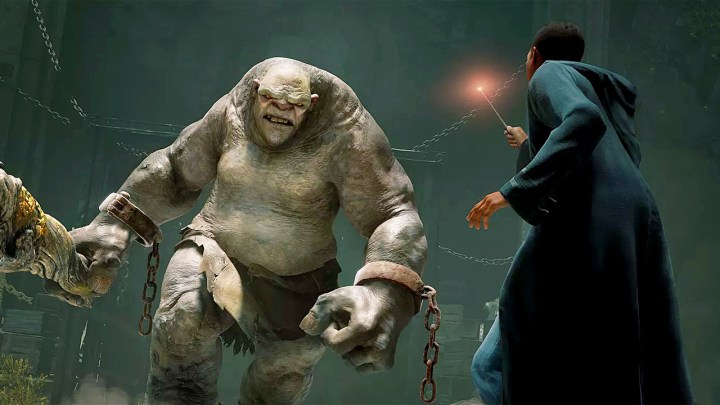
  2. Armored Troll
    • Location: Feldcroft Battle Arena
  3. Ashwinder Assassin
    • Location: Bandit Camps
  4. Ashwinder Duelist
    • Location: Bandit Camps
  5. Ashwinder Executioner
    • Location: Bandit Camps
  6. Ashwinder Ranger
    • Location: Bandit Camps
  7. Ashwinder Scout
    • Location: Bandit Camps
  8. Ashwinder Soldier
    • Location: Bandit Camps
  9. Cottongrass Dugbog
    • Location: Dugbog Lairs
  10. Dark Mongrel
    • Location: Mongrel lairs or next to San Bakar’s Tower in the North Ford Bog region
  11. Fighter Troll
    • Location: Battle Arenas
  12. Forest Troll
    • Location: Bandit Camps and Troll Lairs
  13. Fortified Troll
    • Location: Bandit Camps and Troll Lairs
  14. Great Spined Dugbog
    • Location: Dugbog Lairs
  15. Inferius
    • Location: Can be found in Treasure Vaults, Catacombs, Dungeons, and Lairs
  16. Loyalist Assassin
    • Location: Goblin Mines
  17. Loyalist Commander
    • Location: Goblin Mines
  18. Loyalist Ranger
    • Location: Goblin Mines
  19. Loyalist Sentinel
    • Location: Goblin Mines
  20. Loyalist Warrior
    • Location: Goblin Mines
  21. Mongrel
    • Location: Forbidden Forest and Hogsmeade Valley
  22. Mountain Troll
    • One can be found outside a vault located northeast of the Korrow Ruins
  23. Poacher Animagus and Wolf Form
    • Location: Bandit Camps — you must hit the Animagus in both forms.
  24. Poacher Duelist
    • Location: Bandit Camps
  25. Poacher Executioner
    • Location: Bandit Camps
  26. Poacher Ranger
    • Location: Bandit Camps
  27. Poacher Stalker
    • Location: Bandit Camps
  28. Poacher Tracker
    • Location: Bandit Camps
  29. River Troll
    • Location: Bandit Camps and Troll Lairs
  30. Stoneback Dugbog
    • Location: Dugbog Lairs
  31. Thornback Ambusher
    • Location: Spider Lairs
  32. Thornback Matriarch
    • Location: Spider Lairs
  33. Thornback Scurriour
    • Location: Spider Lairs
  34. Thornback Shooter
    • Location: Spider Lairs
  35. Venomous Ambusher
    • Location: Feldcroft Battle Arena
  36. Venomous Matriarch
    • Location: Spider Lairs
  37. Venomous Scurriour
    • Location: Spider Lairs
  38. Venomous Shooter
    • Location: Spider Lairs

Editors' Recommendations

All Landing Platform locations in Hogwarts Legacy
A magical landing platform.

No open-world game would be complete without a bunch of collectibles. Among the many types in Hogwarts Legacy, the Landing Platforms are perhaps the most difficult to actually find. Unlike most objectives, places, and items that appear on your map, Landing Platforms have to be spotted by eye, with no help from your map. Aside from getting you one step closer to doing everything there is to do in this massive game, there are several rewards you can unlock by finding them, plus it is required if you want to get that Collector's Edition trophy/achievement. To save you the hassle of flying around aimlessly, here are all the Landing Platform locations in Hogwarts Legacy.
How Landing Platforms work

Landing Platforms are special, ornate-looking platforms that have four unlit braziers. You can only reach them once you've unlocked your broom, after which you can fly around and land on them to ignite the fires and "collect" them. Make sure you stand on them long enough for the platform to rotate and the fires are fully alight or it may not count. There are 20 in total, and as you find and activate them, you will get four total rewards from your Challenge menu.

Read more
Where to find every substory in Like a Dragon: Ishin!
Like a Dragon: Ishin Ryoma Sakamoto

The Like a Dragon series is mainly known for two things: deep, complex, and character-driven plots that feel like a full season of a high-budget drama, and outlandish substories. Like a Dragon: Ishin!, despite being set in the 1800s, doesn't shy away from including just as many of these wacky side activities as any other entry in the series. These bite-sized tales are often humorous, though occasionally heartfelt and genuine, serving as diversions from the main plot that are the perfect way to add some variety to your quest. If you love these little sidequests as much as we do, here are the locations for every substory in Like a Dragon: Ishin!
What are substories?

Substories are what sidequests are called in Like a Dragon: Ishin! Many will trigger just by approaching the right NPC at the right time and will see Ryoma get wrapped up in someone's bizarre problems that only he can solve. These usually take no more than a couple minutes, but are always worth doing.

Read more
Like a Dragon: Ishin! skills guide: skill tree explained and best skills
A samurai jumps on the air in Like a Dragon: Ishin!

Depending on which title you started with, Like a Dragon: Ishin! will either feel like a return to the original Like a Dragon (formerly known as Yakuza) gameplay style, or completely new. This remake was never released in the West, but has finally been given a worldwide release. While very different in setting from every other game in the series, Like a Dragon: Ishin! keeps the brawler-style of combat, along with different fighting styles to swap between and upgrade. This skill tree and upgrade system is a bit more complex than some other action RPGs out there. Before you get swept up in protagonist Ryoma's tale of class, politics, and blood, make sure you understand the basics of combat in Like a Dragon: Ishin!
How skill trees work

Ryoma, just like Kiryu in every Like a Dragon game (except for 7), will have four distinct combat styles. Set in the 1800s as opposed to more modern times like the other games, Like a Dragon: Ishin! features very different options from normal. These include stances like Brawler (hand-to-hand focused) Swordsman utilizes a katana), Gunman (gives you a pistol), and Wild Dancer (where Ryoma will wield his sword in one hand and handgun in the other). Each style has strengths and weaknesses, as well as its own individual skill tree that you can invest in.

Read more